Bulk-Import data
When you have multiple recordings or structured research data from a survey or a participant panel list already available, you can bulk-import this data and create multiple Sessions or multiple Participants at once.
We support bulk-importing for CSV, Excel, or Google Sheets files.
How to import multiple Sessions
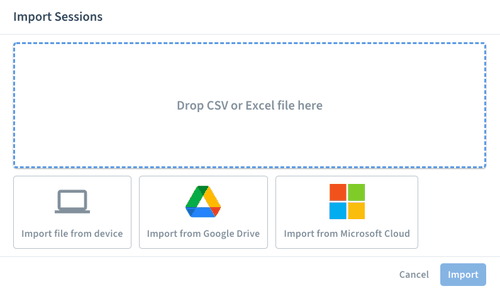
In a project, go to and click on to upload your recordings, CSV, Excel, or Google Spreadsheet file. You can upload the files manually or via our Zoom Microsoft Cloud or Google Drive integration.

Note: If you have spreadsheets from Google Sheets, you can also embed and preview live sheets in Condens.

For spreadsheet data, you can define how the data should be transferred to Sessions:
Click on the to define whether each column or each row reflects a Session. Per default, the first row/column will be used as titles. (If this doesn't apply to your research data, you can toggle it off and name the fields individually.)
Second, go through the different fields and define how you want the data to be brought to Sessions more precisely. There are several options:
You can choose an existing Session Information Field that you have already used in this project.
You can create a new field: Either as a new Session information field or a new Section. Here's how to assign matching rubrics:
Numerical questions, structured answers to multiple-choice questions, or any other demographic data should be imported into the Session information field.
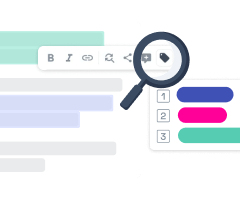
Free-form text answers are imported best as Sections so that you can structure and analyze those with Highlights and Tags.
Tip: Below the table, you see a preview of how the different fields will be placed in the new Sessions.
You can exclude rubrics from import.
You can also create, link, and update Participants while importing Session data. To identify which data belongs to a Participant, click on the respective column header, then go to ‘Participants’ and choose the Participant Information field.
For initial imports (data not yet in Condens), use a unique identifier such as the email address as the ID. You can select the ID field by clicking the button next to the column. If the participant ID value does not exist already, a new participant will be created.
For updates to participants already in Condens, you can use the “Condens ID” (assigned automatically when participants are added to Condens via previous imports or exports) for more accurate updates without duplication.
Confirm your import settings and start the import.
How to import multiple Participants
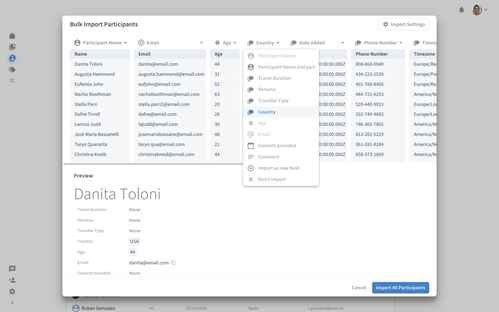
Click on in the menu on the left, then click and choose . In the next step, choose the Excel or CSV file you want to import and define how the participant data should be imported to Condens.
Click on the to define whether each column or each row reflects data from one Participant. Per default, the first row/column will be used as the names of the Participant information fields. (If this doesn't apply to your research data, you can toggle it off and name the fields individually.)
There are several options to refine the import for each field:
You can choose an existing Participant Information Field that you have already used for other participants in your panel.
You can create a new field.
You can exclude rubrics from import.
Confirm your import settings and start the import.

If you want to know how to update your participant pool via bulk import without duplicating existing ones, read more about it here.
Tip for Participant Names: If there are multiple fields for the participant name (first name, last name) we combine them in one Participant field. You can determine the order of the names, add a third name or remove one part of the name.
Bulk-Import is not working?
Importing structured data to Condens often involves transferring large amounts of data from diverse sources. In order for this to work smoothly, it may be necessary to prepare the file to be imported appropriately. Here are some tips to prepare your spreadsheet file:
Make sure that your file is a valid CSV or Excel file: When you have a spreadsheet in a different format like a Numbers spreadsheet (a spreadsheet created with the Apple program Numbers that has a file name like filename.numbers), export the file and save it as an Excel or CSV file before importing it to Condens.
Make sure that exactly one row (or column) is used as a title for the content in your file: So when you want to import a survey, it's helpful to have the question in one field and all answers in the same row (or column) - and no other descriptions in the extra fields around your question.
Make sure to have the relevant survey data on the first sheet of your file.
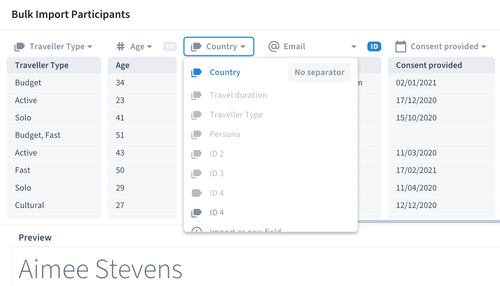
Handling multi-select fields for import: If you import data as a multi-select field (e.g. country) and some entries contain multiple values (e.g. Spain, USA) you can make these values show up separately, so "Spain" and "USA" instead of "Spain, USA".
In the drop-down of the respective column, scroll down to the field and choose the "No separator" button where you can indicate how the values are separated. After you confirm, the values will be imported individually.


