Use Claude Code with the Claude Desktop app
If you're on a Condens Business plan, you can use Condens data in Claude Code through Claude's Desktop app. Once you connect Condens to Claude, Claude Code will have access to Condens automatically.
Set up Claude Code without the Claude Desktop app
MCP servers in Claude Code can be configured at three levels:
User level — applies to that individual across all their projects
Project level — applies to everyone working on that project who uses Claude Code, since the config file is committed to the repo
Enterprise/org level — admins can push MCP configs to all users through the Claude.ai admin console, so individuals don't need to set it up themselves
If your organization is on a Claude Enterprise plan, an admin can handle the MCP setup for everyone. Otherwise, each user needs to add it individually, or a project-level config can cover it for a specific repo.
Here are the steps:
Install Claude Code, if you haven't already. We recommend using the Native Install method and copying the relevant option's command into your Terminal.

Check out Claude's Terminal guide for new users.
When you run
claudefor the first time, Claude Code will ask you to confirm access to the folder you're in. Make sure you navigate to the right folder before launching it since Claude Code will be able to read, edit, and execute files in that folder.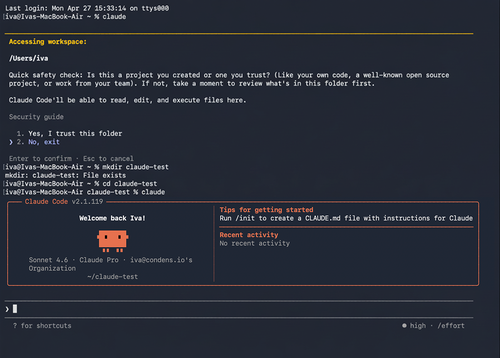
Connect Claude Code to the MCP server. To add Condens, paste the following command into your Terminal:
claude mcp add --transport http condens-mcp https://api.condens.io/mcpNext, run the
/mcpcommand, then select Condens, and click Authenticate.You'll be redirected to a new browser tab saying the app could not be authorized. This is expected: the page is showing you the Redirect URI you will need a bit later, so please copy it.
Open Condens in a new tab, and then go to Settings > Account > API & MCP Server.
Click on
 Add MCP Client.
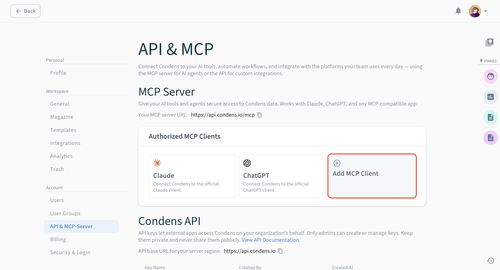
Configure your custom MCP:
Add a Client name and Description, and upload a logo.
Paste the Redirect URI from Step 5. Optionally, if you're setting up Claude Code on an organizational level, you can use the wildcard (http://localhost:*) as Redirect URI to ensure it works for all users regardless of their local port.
Set which users, roles, or user groups this MCP client is Available for. Once the client is configured, these users will be able to connect to this MCP client via their own account in Settings > Integrations.
Go back to the authorization tab from Step 5. Reload the page, and then click Continue to authorize the app.
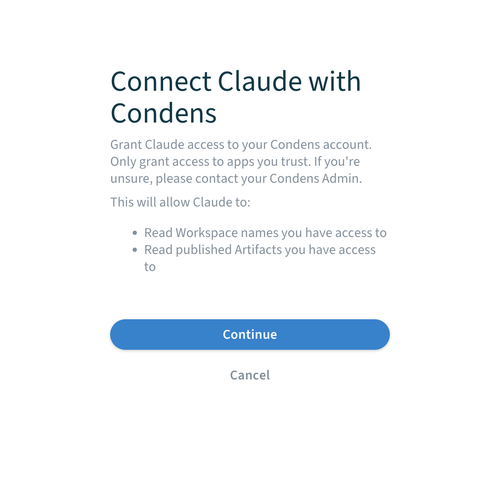
You'll get a confirmation message when authentication is successful. Go back to your Terminal and run
/mcpagain, you should see the status as connected.Unless you're on a Claude Enterprise plan and your admin pushed the MCP config to all users via the admin console, each user specified in Step 8.3 will need to complete the setup individually. They can do so by following Steps 1–3 of this guide to install Claude Code and add the Condens MCP, then picking up from Step 4 to authenticate.
