Use Case: Selected tickets get send to new Condens Sessions automatically
In Zendesk, your support team probably regularly receives many product questions, feature requests, reported bugs, and other questions and feedback. This is a valuable source for user research as well. Imagine having detailed descriptions of user problems and contextual information that people already shared with the support available for upcoming research requests. There's a high chance this will enrich your research database and potentially point you towards customers you can invite to new research studies as you already know a bit about their research context.
For example, the automation may work like this:
Requests considered by agents to be particularly interesting, detailed, or currently relevant to the team can be added to a Research View in Zendesk.
In Zapier, you set up an automation workflow that pushes all tickets in this Research View to new Condens Sessions automatically.
Each selected ticket will appear in your Condens project automatically, and you can use the feedback for analysis and find it via the keyword search, for example.
Automate steps with Zapier
Both Condens and Zendesk provide a Zapier integration that enables you to set up automations between the two. This way, you can automatically send data from Zendesk to Condens or the other way around based on specific events (also called triggers).
Before you start you should know:
Please note that this requires a Zapier account and may require a paid plan for Zapier.
Also, this automation requires a Zendesk Premium Account and is available for all Condens Team, Business and Enterprise plans.
How to connect Zendesk and Condens with Zapier
Connect your Condens and your Zendesk account to your Zapier account. Follow our step-to-step Zapier set-up guide for this. Alternatively, you can connect the tools while creating a new Zap.
In Zendesk, create a new View (e.g., call it 'Research View')
A view in Zendesk helps you to organize incoming tickets. Here you find information on how to create a view in Zendesk.Define the criteria when a ticket gets added to this View. This depends on your support workflow but can consist of:
a certain ticket status (like Solved)
a particular keyword that agents added (like Research, UX, or Repository)
specific roles that can add tickets to the Research View
In Zapier, start creating your Zap (your tool automation) by using this template.

Tips:
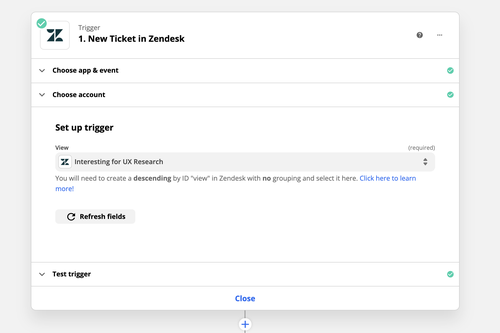
As a trigger, select Zendesk - New Ticket and choose your Research View in the next step.
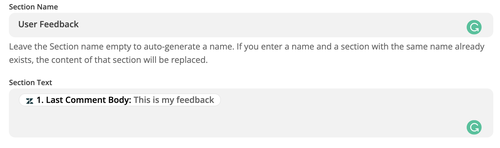
Map the ticket content (e.g., "last comment body") to Section Text in Condens.
Add a step to create a new Participant in Condens in advance so that you can include this information in your Research Session.
Turn on the Zap.
In Condens, all tickets added to your Zendesk view will be added automatically.
