Stage 1: Create a new MCP server in Glean
Go to Admin Console > Platform > Actions tab in Glean, and then click Create New Action.
Click the Configuration tab, in which you will:
Add MCP server name
Add a description
Enter the MCP Server URL.
Depending on your server region, it's either https://api.condens.io/mcp (EU) or https://api-us.condens.io/mcp (US).
If you're unsure, the correct link is always visible in Condens' MCP Settings for you to easily copy and paste.
Select Streaming HTTP as Transport type.
Choose the Dynamic client registration as the Authentication method.
Next, click on the Initiate connection button to Connect to server.

You'll be redirected to a new browser tab saying the app could not be authorized. This is expected: the page is showing you the Redirect URI you will need a bit later, so please copy it and keep this tab open.
Stage 2: Add a new MCP client in Condens
Open Condens in a new tab, and then go to Settings > Account > API & MCP Server.
Click on
 Add MCP Client.
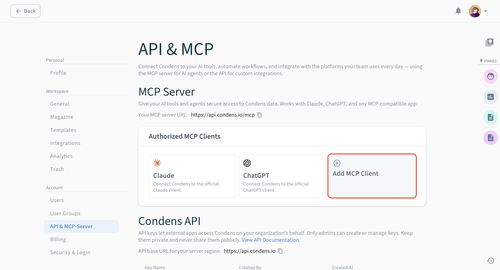
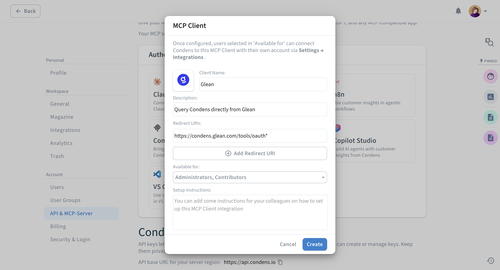
Configure your custom MCP:
Add a Client name and Description, and upload a logo.
Paste the Redirect URI from Step 5. Optionally, you can add a wildcard to your Redirect URI. For example: http://your-company.glean.com/tools/oauth/verify_code would turn into http://your-company.glean.com/tools/oauth*, so that it works with anything that comes after this prefix.
Set which users, roles, or user groups this MCP client is Available for. Once the client is configured, these users will be able to connect to this MCP client via their own account.
Once you're done, click on .
Stage 3: Finalize the setup in Glean
Go back to the authorization tab from Step 5. Reload the page, and then click Continue to authorize the app.
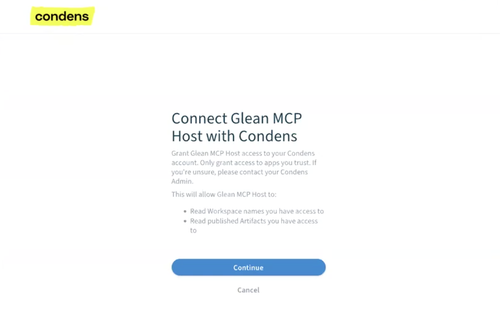
You will get a confirmation that you have successfully connected to Condens and will see the status updated to Connected.

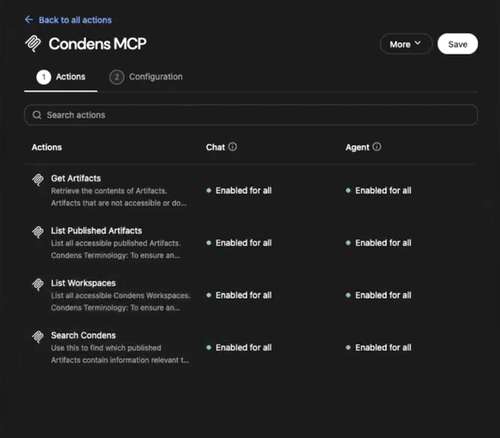
At the bottom of the Configure tab is the option to Enable actions. Click on it.

Configure these settings as you wish, and make sure to click on — this is what makes actions usable for selected teammates.
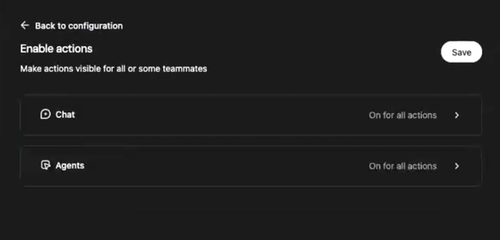
If you then check the Actions tab, you will see the status updated to Enabled.
As a final step, click on in the top right corner.
You can test the connection by starting a new chat and asking a question relating to Condens or data in your research repository.
Any teammate using this MCP server for the first time in Glean will be prompted to Connect their account individually. Once connected, they can continue querying Condens directly from Glean.
